How to Change Margins in Word
Usually the whole article paper or report is printed in the Portrait mode but for a page with the big table it is more convenient to use the Landscape mode. Change margins in your document to change the layout and make sure everything fits.

How To Change Page Margins In Microsoft Word 2010 Solve Your Tech Microsoft Word 2010 Microsoft Word Document Words
Apply a predefined margin setting.

. On the Layout tab in the Page Setup group you can easily change the page. Change orientation of one page in Margins. Change Measurement Units in Word 2003.
If you want to change the page apply section you can click in a section. In order to change the page margins or the paper size or orientation the number of columns or in most cases the content of the header or footer you must insert a section break. It will only appear when viewed digitallyas a Word document PDF or web page.
If your document contains multiple sections the new margins apply only to the selected sections. 4- Choose the Show crop marks box. If you want to see the margin of your word document on your screen you have two ways.
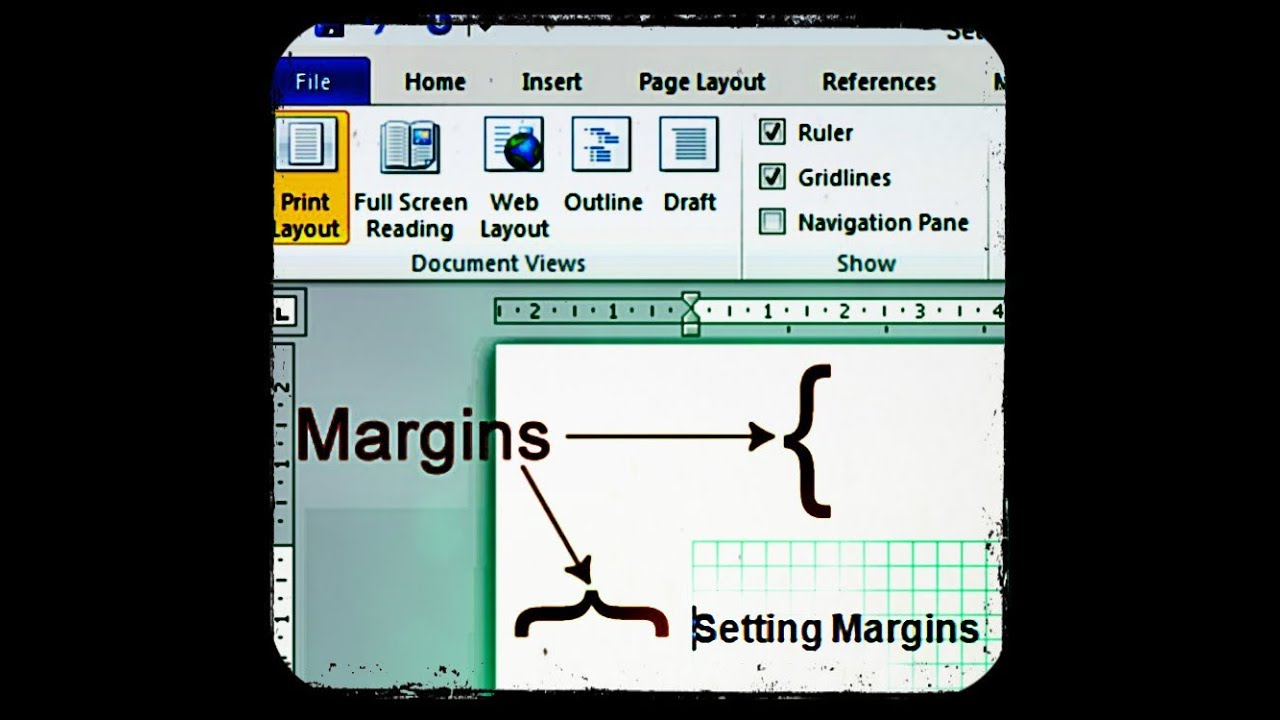
To change margins click on the Margins button found on the Page Layout tab. Open a new or existing document and find the Ruler at the top. MS Word automatically sets one-inch margins around each page of the document.
You can change each of the four margins in the dialog box that appears. Heres how to set margins in MS Word. Double-click on your word document to open it and consequently launch Word.
For this reason you may believeand many people will be quick to tell. If for instance you want to have a 2-inch margin on the top a 15-inch. Click Advanced in the left pane.
Select the Layout tab in the ribbon see figure 7. Choose Viewer or Commenter when sharing so others cant adjust the margins. Different margins different section.
You may know that margins are a section property. Select the dialog box launcher in the Page Setup group. Page orientation defines the direction for printing or displaying the document in Word but one does not have to be the same for the entire document.
To change the margins for part of a document select the text and then set the margins you want. In the Apply to box click Selected text. The first way is showing crop on your screen.
They can request edit access if. The preset menu is also available in the Print tab in the backstage view. How to Show Crop Mark on Your Screen 1- Click on the File.
Setting Resume Margins in Microsoft Word. The geometry package the fullpage package or changing the margins by hand. The geometry package is very powerful but can also be complicated to use.
Page color wont be printed. Unlike Word OneNote wont have custom margins to choose from such as Normal Narrow Moderate etc but you could always follow the same dimensions. The scope of the printing problem may reveal its cause.
Test printing in other programs. Click the left or right indent arrow and drag it to adjust the margin size. In the Page Setup dialog box click the Default button and then click Yes.
Change management sometimes abbreviated as CM is a collective term for all approaches to prepare support and help individuals teams and organizations in making organizational changeIt includes methods that redirect or redefine the use of resources business process budget allocations or other modes of operation that significantly change a company or. Set the margins. Select the margin measurements you want.
Only adjust the Gutter margin if you intend to use the document in a bound format like a book or report and you need space for the binding. How To Set Up 1 Inch Margins In Microsoft Word. Any graphic in Word can have one of a set of text wrapping settings.
To change the size of the margins move the sliders located at the top of the document or set them through the Page Setup function. Page orientation defines the direction for printing or displaying the document in Word but one does not have to be the same for the entire document. Each new document based on that template automatically uses the new margin settings.
Using the Borders and Shading dialog box customize how you want the border to look. To change the default margins click Margins after you select a new margin and then click Custom Margins. After you make your selection the Margins drop-down menu will close and your margins will adjust immediately.
Select Layout Margins. Now you can see the crop mark on the screen. The In-Line With Text setting makes it behave like a character but any of the others will allow you to drag the graphic anywhere on the page.
Microsoft Word 2003 and older versions have standard margins set at 1 inch on the left and right and 125 inches on the top and bottom. Usually the whole article paper or report is printed in the Portrait mode but for a page with the big table it is more convenient to use the Landscape mode. Microsoft Word automatically inserts section breaks before and after the text with the new margin settings.
Select File Page setup Margins and set the Top Bottom Left and Right margin sizes. Select a unit of measurement from the Show measurements in units of drop-down list. 3- On the left panel choose Advanced.
Create a custom margin. To preset the margin size. Finally you can add page borders along the margins to give it a finished look.
In such a case type a number in Gutter that will allow enough room for the binding and use the drop-down to indicate. However If youre not sure of your current margin setup or you want to allow some more or less margin space on your resume you can easily change the configuration. On the Design tab click the Page Borders button.
Select Layout Margins. Under the Print margins section you can amend the top bottom left and right margins to your preference. On the Layout tab in the Page Setup group you can easily change the page.
Word lists a number of pre-formatted options but you can also make your own margins by selecting Custom Margins found at the bottom of the Margins list. Follow the below guide to change the margin size in your Word document. The Word Options dialog box displays.
If Word cannot print at all or if Word cannot print a certain font or a specific type of graphic go to the next step. If your document is already divided into sections you can click in a section or select multiple. In the Page Setup window select the orientation you need in Oriention section and choose Selected text in Apply toClick OK.
If you want to change them you have several options. This is the standard for book margins. Scroll down to the Display section.
Change Print Margins. You can right-click the icon and click Wrap Text then click one of the other values such as Square. Now the unit of measurement is different as displayed below in the Indentation section of the Paragraph dialog box.
Select the entire page that you want to change the orientation then click Page Layout Margins and select Custom Margins. The default margin size in Microsoft Word is set as 1 inch although users do have the option to manually adjust the margins of every side. 2- Click on the Option key.
For example some printing problems affect only Word whereas other printing problems affect several of or all Windows-based. By far the easiest way to use it is to specify the margin as an option to the package. Type numbers indicating the width of your margins in the Top Bottom Left and Right fields.
The new default settings are saved in the template on which the document is based.

Setting Margins In Microsoft Word 2019 And 365 Words How To Apply Page Setup
How To Change Margins In Microsoft Word 2010 Youtube Microsoft Word 2010 Book Writing Tips Words

Setting Margins In Microsoft Word 2019 And 365 Words How To Apply Page Setup
Change Margins Word Web Layout Microsoft Word 2016 Words


Comments
Post a Comment